I apologize ahead of time for the length of this post. I originally was going to just share how I made my crate stools but had a few other pictures I wanted to share.
As I was sitting in my living room doing some school work on my computer on last night, this little friend paid a visit to me. My boys and I watched it as it sat on something right above my shoulder. I told my boys that dragonflies symbolize different things so we went to Google to see what we could find. Here is the definition that we found...
The dragonfly normally lives most of its life as a nymph or an immature. It flies only for a fraction of its life and usually not more than a few months. This adult dragonfly does it all in these few months and leaves nothing to be desired. This style of life symbolizes and exemplifies the virtue of living IN the moment and living life to the fullest. By living in the moment you are aware of who you are, where you are, what you are doing, what you want, what you don’t and make informed choices on a moment-to-moment basis.
This ability lets you live your life without regrets like the great dragonfly.
This ability lets you live your life without regrets like the great dragonfly.
SO.POWERFUL!
It makes me think of our profession as a teacher. Every single day we are teaching kids and making decisions based on events happening in our classrooms. We have to make split second decisions. Every day we do our best to teach our students. One day they are gone. Hopefully every single thing we do for our students is beneficial and they have grown. They feel valued and loved. They have learned. Every year I reflect and think back to situations that have happened and wonder how things would have ended if I had done something differently or reacted a different way. I hope that all the decisions I make are the best decisions possible. I hope that everyday I have given 100% or more and that I have done the best job possible.
This also makes me think of my life. There are so many times that I think about the past or worry about the future. So much that sometimes I am not the happiest person that I could be. I have to live in the moment more and let things go. Tomorrow is not a promise and if I am doing the best that I can and am enjoying what is around me...right now...I'm doing good.
I took these in my living room. The boys were scared at first but in researching them we learned that they are harmless. Now they are okay with it flying around.
I wanted to share this picture too. On Saturday a friend of mine asked if I wanted to go to a summer music festival that was going on in a town near us. It was last minute and I didn't have anything going on. It was so much fun! Montgomery Gentry was the headliner for the evening. We wanted to go see his bus (it has a cool picture on it). While back there, we started talking to a security guard and one of the drivers that was hauling all the equipment. Everyone was super nice. Troy ended up coming over to where we were and took a picture with us.
Finally the real reason for this post....today I made Crate Stools for my classroom. I recently pinned a set of instructions on how to make them. They looked so easy. I think it said that it only took about 1 1/2 hours to do it. Well, I started the whole process of gathering supplies at 3:30. I finished the project at about 8:00 p.m. Once I had all the supplies, it wouldn't have taken so long, if things went right. LOL!
1. I took my crates to Lowe's. I had them measure the inside and outside of my crates. Instead of having the board sit on the inner frame, I wanted to make it extra sturdy and have the board on top too. So, while the guy was cutting my wood (I asked for plywood) I went next door.
2. While waiting for my wood, I went to JoAnn Fabric to get the foam to sit on my crates. While there I made quite the mess.
3. I found more fabric choices. I already had one at home but found all these cute ones too. I ended up getting the third on down because it matched both crates. When I got home, I used the stuff that I already had from IKEA. So, the new fabric will probably be used for pillows or curtains.
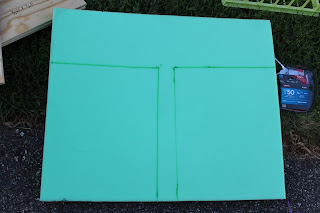
4. I went to the area with foam. It was 50% off! Thank goodness! That stuff is expensive! I picked the pieces I wanted and went to the fabric counter to have it measured.
6. I laid everything out in the grass. One of my neighbors complained one year when I was drying out 23 t-shirts on my lawn. We had tie-dyed them at school. I got a note in the mail saying I needed to keep them in the garage next time. We don't live in an association and they were only out for 3 hours. I knew I had to get done with this project tonight and that it was probably driving her nuts because I was doing this outside.
7. I went to lay the smaller board on the inside frame. It didn't fit!!!! I didn't know what to do. I was going to take them back, but my hubby pulled out his saw.
8. All the stuff laid there.
9. I measured the big boards (which did fit on the top) onto the foam. I used a steak knife to cut around the boards. I used foam that was 2 inches thick. I wanted it a little bit thicker so there was more padding for the kids.
10. My hubby cut an extra 1/8 inch off the smaller boards.
11. I laid the bigger board onto the foam. I laid it on the fabric with the print side down. I cut around the board leaving about 3 extra inches. I only needed to use 3 yards of fabric in all for 6 crates.
12. While hubby was cutting boards, my son and I tried to figure out how to use the staple gun. We couldn't get the staples to load.
13. Hubby came over to see what the problem was. For a few minutes we tried to load the staple gun. He figured out that he bought the wrong size of staples so he headed back to Lowe's to get more.
14. While he was gone, my youngest son played with the foam. I had to beg him for it back. He wanted to keep it for a toy! I won!
15. I laid all the boards out on the material and waited for hubby to get home. Luckily, Lowe's is not that far from our house.
16. When we had the gun working, I started to staple two sides together. The first one that I did, I pulled too tight. It showed the bumps along the side of the foam.
17. I wrapped the other edges over like a present. Each one I did a little differently because I figured out different ways to fold them to make it easier and more appealing to the eyes.
18. When they were done, my 4th grade son came out and tested them out. He had been inside and brought out some cucumbers that he cut for a snack for me. (Yes, he is in his pj's..it's summer and it's a good day if we all change out of them before evening.)
19. The top board is on all the crates.
20. Looking pretty good.
21. This is the step that I added. The boards that I attached the foam and fabric to fit on the top of the crates. This is the smaller board that fit on the inside rim. I spread wood glue on it.
22. I put wood glue on the underside of the fabric board. (yep...I was never good at wrapping presents...it looks horrible underneath)
23. I put the big board back on top of the little board. It's now reinforced. The seat does not move because the little board is holding the top board in place. The seats are drying and sitting in my garage with all the stuff waiting to go to school. These match my baskets and the glider chair that I found at an online garage sale.
Here are some picutes and a rug for my room. The stools match them pretty well.
Here is the picture and carpet. for in my room! It matches well.
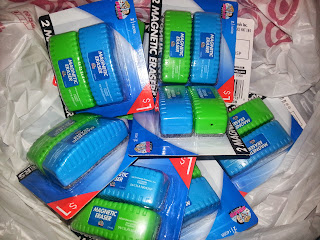
Even my erasers match my color theme!
This is the picture that I found for my room that made me decide I wanted to have a "theme" and "color theme" in my classroom. I think the crates match it very well. I am excited to get decorating!
Have a great day!
If you have any questions, email me at sara3795@gmail.com and I will try to help you.
Sara


Very cute seats! I love mine!
ReplyDeleteSara
Polka Dot Kinders
Thanks Sara! Do you use them at your guided reading area or in your book corner?
DeleteI love your owl theme! Very cute. :)
ReplyDelete- Pam
Moments to Teach
Thank you! I am excited to have a theme! :)
Delete